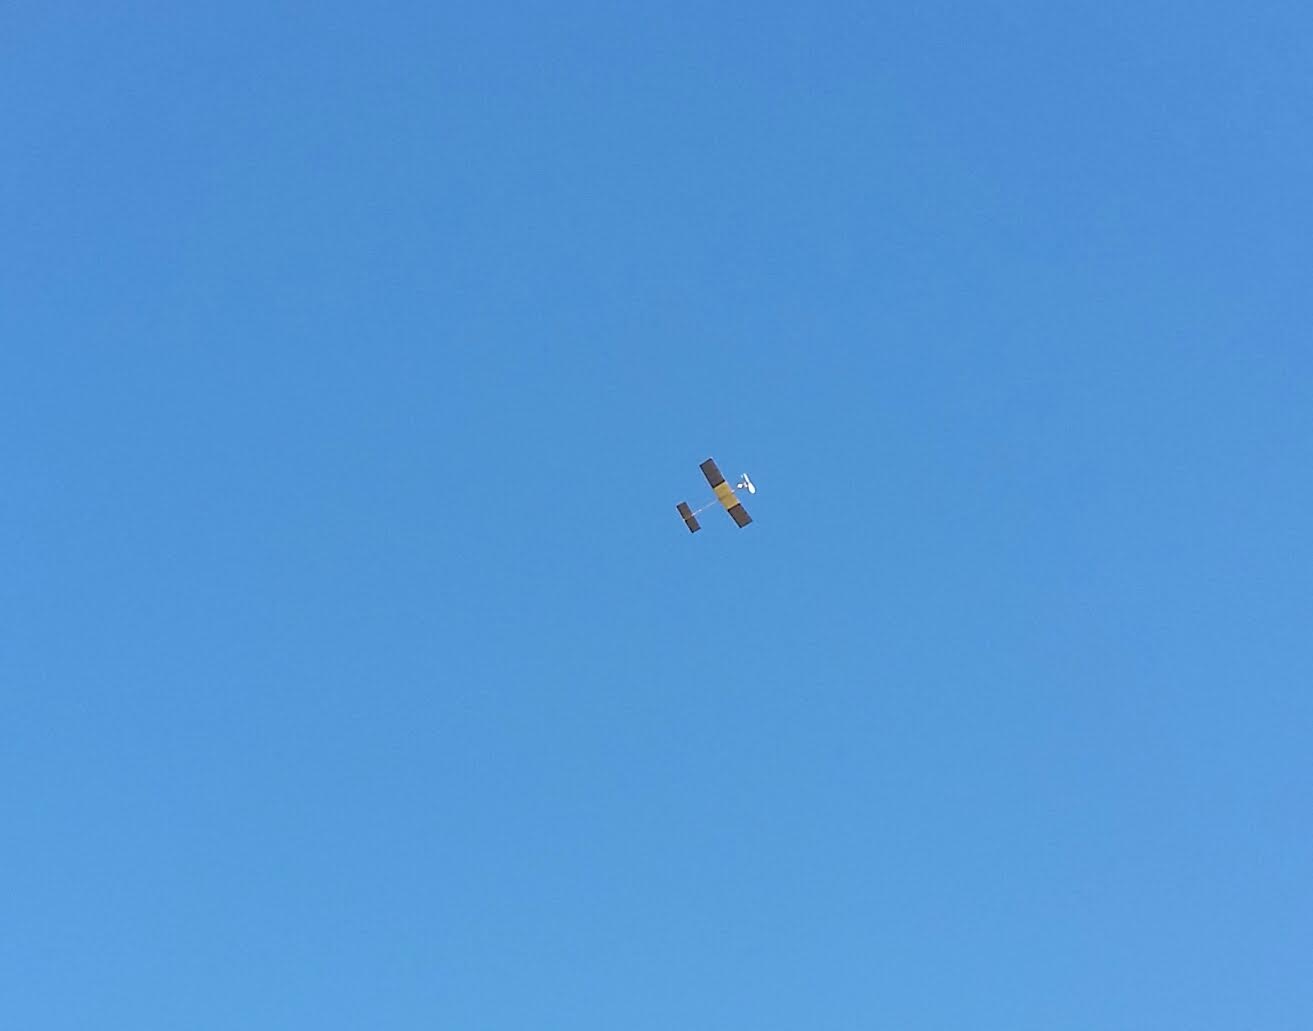
Monday, April 24, 2017

CO2, Gliders, E20, and Embryo Weekend Flying

Nice model flying weather for the weekend and I tried to make the most of it.  I started out by trying to fly my CO2 engine powered model that I had just installed a fuse DT system. When I filled the CO2 tank it turned all frosty and the motor did not run, I put it away and flew my Retro Gnome free flight hi-start glider using a short hi-start. There probably would have been room to use longer hi-start on the farm land I was flying from but I had limited time. The trouble with the hi-start not releasing from the autorudder post seems to be solved with more weight directly under the towhook ring on the hi-start.

CO2 Powered Model 


Fuse DT Added
Frosty Tank
Bad Color Over Dirt
Retro Gnome

It was warming up pretty fast so I tried the CO2 powered model again. Filled it up and couldn’t find my lighter right away for the fuse so I launched it unlit. Oh no it climbed out perfect and was getting rather high. Luckily it didn’t find lift and came down in another field; it is the worse color for finding over dirt fields, black.  One more flight but this time I lit the fuse and it came down in a slow spiral as the front of the wing pops up. Two things improved my working with DT fuse; electric lighter I purchased from Larry Davidson and I used a new wire cutter to cut the fuse as recommended by Dan Berry instead of an old scissors.


Sky Demon E20


It was getting time to leave but I flew my e20 Sky Demon a couple of times and took video on one flight. Not very good video as it was headed in front of the sun. As I was putting my glider away I noticed a bunch of rips in the covering, this was from what was left of the soybeans. One hole in the e20 wing and the CO2 model had no rips because it had landed in what had been a cornfield.


Jestream Crash


That afternoon I flew at a different field that was grass, my RC soaring friend was there so I had him help with my Jetstream towline glider. At times there was little wind and I had to run fast to get it to climb. The transition to glider was not perfect and then on the last flight it spiraled into the ground. Wet ground probably saved the fuselage but wing broke pretty bad. The structure was fixed that evening but I still have to recover. A couple people gave me detailed advice on adjusting a towline before flying again.


Bad Axe Embryo


This weekend I wanted to fly my new Bad Axe embryo rubber powered model. About the time I went to launch it would get windier but it flew well, just got downwind fast. Next flight after lighting the fuse the wind comes up and I wait some before launching. It did not fly that long and I got to see the DT system in action; I forgot to add the DT limit for pop up wing. The wing flutters one direction and the fuselage went another direction but no damage to either.  Decided to fly RC sailplane after that, darn I get my exercise.

The next morning I tried to get out early to fly my embryo again but should have been out even earlier as the wind was increasing and workers were doing a controlled burn of the surrounding ditches. I did get in a couple of flights but did not wind sufficiently to gain much altitude. Trying to launch your plane and take video is not easy but I did get some that I will link to.

Bill Kuhl

Related Articles
http://scienceguyorg.blogspot.com/2016/12/sky-demon-e20-build-report.html
http://scienceguyorg.blogspot.com/2017/04/my-start-in-co2-powered-free-flight.html
http://scienceguyorg.blogspot.com/2016/12/building-retro-gnome-ff-hi-start-glider.html
http://scienceguyorg.blogspot.com/2017/04/jetstream-a1-towline-glider-build-report.html
http://scienceguyorg.blogspot.com/2017/03/bad-axe-embryo-thermals-do-not-care.html

Vendors
Bad Axe Embryo Volare website  Bad Axe Embryo on Volare website
http://www.bmjrmodels.com/sky-demon   - Sky Demon kit on BMJR website
http://retrorc.us.com/retroemoth-1-2-1-2-2-1.aspx -   Retro Gnome product link
Jim O’Reilly Model Plans  Jetstream - http://www.jimoreillymodelplans.com/prodserve.htm
Larry Davidson Fuse Lighter  - http://www.modelflight.com/larrydavidson.html


Videos From Weekend Flying


Wednesday, April 19, 2017

BMJR Sniffer Build Report

Purchasing the BMJR Sniffer kit was a bit of an afterthought, I was purchasing a Witch Hawk 500 free flight and thought I remembered there was a discount for a second kit. The Sniffer caught my eye because of the classic old timer look and I had a couple of Cox PeeWee .020 engines. Turns out the discount ended the month before but I still think the Sniffer was a good purchase.  I thought I could enter it in PeeWee 30 event at the Nats but people told me there were much more competitive designs so I am building a Basic Yeller for Cox PeeWee .020 power and using electric power for my Sniffer for sport flying.  It will have radio control equipment for motor control and DT, my hope is to be able to fly it from a rather small field if I want to and bring it down at will before flying into a tree.


Midwest kitted the Sniffer and Super Sniffer a larger version back in the 1950’s. The Sniffer would often use a milder .049 engine of the time but the Cox PeeWee .020 is said to be a good match, stronger .049 engines are too much power but would work in the 48” wingspan Super Sniffer. I was thinking of the option that I could add a rudder to fly mine RC but from reading experiences of people who have converted the Sniffer to RC it appears it has too much polyhedral to control properly.  Rather defeats the charm of free flight too.


Doubler Added Inside of Fuselage at Splice

Building the BMJR Sniffer kit was really straightforward; I did make a couple of modifications in areas I thought might be a little weak. First I had read a couple of people had the fuselage break at the splice point so I used a thin balsa doubler over the splice. For the landing gear I used plywood doubling instead of balsa and added a couple of gussets.  Not sure if it is needed but I would rather not have to fix broken landing gear mounting later if possible.


Landing Gear Mount - Plywood and Gussets Added

Electronics I will be using was purchased for a RC conversion I did of a Guillow’s Cessna 150. The small brushless motor was really too much power for the Cessna 150. This same motor I have in a couple of RTF RC planes, Sbach and Pitts, 2 cell 180 mah lipo battery. I think for the somewhat larger free flight Sniffer it should be about right and I can always use less throttle.  My hope is to learn from observing the power pattern from launching at varying power levels.  I feel also with complete control of motor I can climb to the altitude that I think the field size will justify. When I took motor off the RC flying wing I had it mounted on I noticed the plastic motor mount was broken. 


Electronics


No doubt I could have ordered a new motor mount but I decided I could make one out of thin brass stock and brass tubing. Materials were found at local hardware store and cutting and drilling was easy, soldering the tubing to the thin flat brass sheet, not so easy. Using my soldering station at the highest setting of 680 degrees wasn’t enough heat to get the solder to flow well. After trying long enough I did get the job done but it looked like heck.  


Sloppy Solder Job

To open myself up to criticism I posted a picture of my soldering job on the Internet. Actually people were kind and gave me a couple of good suggestions.  One was to use a small butane torch and the other is to use Stay Bright brand solder. These are things I want to try in the future but my solder job seems adequately strong. Actually I would like it to break loose in a really hard crash.

I just finished up covering and just have the final details before test flights. Then I can see if the plane lives up to its’ name and sniffs out thermals.

Bill Kuhl
http://www.ideas-inspire.com

Related Links

http://www.bmjrmodels.com/free-flight/sport-free-flight/sniffer   BMJR Sniffer
http://www.bmjrmodels.com/super-sniffer  BMJR Super Sniffer
http://scienceguyorg.blogspot.com/2014/10/guillows-cessna-150-flies.html Guillows 

Wednesday, April 12, 2017

What I Like Most About my Model Aviation Hobby

The more years I am in the model aviation hobby, the better idea I have what about it interests me the most. Now I have several RTF foam RC planes that I do enjoy flying at times but what really holds my interest is when I build a model from mainly balsa and have to make adjustments to it to make it fly well. My interest in free flight models has increased as I went beyond building the simpler free flight models that fly rather slow in all stages of flight to models that climb quickly and must transition to a slow glide. 


Starduster E36 during DT

Last weekend I flew three different free flight models that have different flight characteristics. I was out flying early one morning while it was still slightly below freezing, but the wind was almost still. Short motor runs of my E36 Starduster with quick DT went well but it was still turning right under power. After several flights I got out my Retro Gnome a free flight glider that is launched by hi-start using rubber that is only 1/16” wide and a length of line.   The launch appears to be straight as it should be but I am still having trouble with the release of the autorudder line even after changing to washer over a pin like on my Jetstream towline. There still must be too much tension on the line, I will fix that.


Retro Gnome on Frosty Ground


Launching Retro Gnome


For where I was flying the hi-start is really too long for a small field and I never had it stretched back far enough to get a really high launch. I am going to make up a shorter hi-start for testing purposes and use 3/32” rubber instead of 1/16” for a faster climb without so much stretch of the rubber. 


That afternoon earlier the wind was still pretty low so I stopped back for more flying. First the Starduster which I increased the motor run to 5 seconds and move the thrustline slightly left. If I gave it a launch banked slightly to the left it had a pretty good climb to the left. On transition which I increased only slightly it appeared too sharp to the left. My wrapping of the rubber bands on the stab was not the best and while trying to redo it I broke off the plywood mount, time to get out another plane.


Sky Demon e20


The wind was increasing at times so I changed the DT after motor run on my Sky Demon e20 down to just 20 seconds with 10 second motor run. Probably a good thing as it was quickly drifting towards the edge of the field and it was bouncing around in thermal lift. I think the flight pattern is pretty good in calmer conditions.  There were two guys flying RC sailplanes and they were finding good lift.


RC DLG Perfect for Small Slopes

By late afternoon the wind was up pretty good and I went slope soaring in the evening.  The wind was not in perfect direction but it was pretty smooth most of the time. At least the sun wasn’t directly in my eyes like so often it is in the afternoon. Dynamic soaring laps were pretty slow. 


Hard Landing

On Sunday morning the wind was down early and I made more flights with the e36 Starduster. I made too many flights before changing out the battery and on the last flight it did not get very high and came down a little hard before DT was activated.  Some damage to the fuselage but it was an easy repair and the glue joints were not done well the first time. That evening I made test glides with it off a hill that was maybe 10 feet high. As I took out more of the stab tilt the glide improved. 


Polecat X


It really was obvious to me that trimming the faster free flight planes could be more challenging than the slower planes. My Polecat X p30 appears to fly near perfect without adjustments but I have not got anyway near full winds which may change the flight pattern, same with the Bad Axe embryo.  The Jetstream A1 towline and Wilbur rubber model have only had hand glides from level ground. 


All of it is fun, I realize I am the type of person that likes to tinker with things, free flight model airplanes is the perfect outlet for me to do that.


Bill Kuhl
http://www.ideas-inspire.com

Related Articles

http://scienceguyorg.blogspot.com/2017/01/starduster-bmjr-e36-build-report.html
http://scienceguyorg.blogspot.com/2016/12/sky-demon-e20-build-report.html
http://scienceguyorg.blogspot.com/2016/12/building-retro-gnome-ff-hi-start-glider.html
http://scienceguyorg.blogspot.com/2017/03/polecat-x-p30-build-report.html
http://scienceguyorg.blogspot.com/2017/01/building-wilbur-nos-rubber-model.html
http://scienceguyorg.blogspot.com/2017/03/bad-axe-embryo-thermals-do-not-care.html

Vendor Links

http://www.texastimers.com/  Texas Timers  eMAX timer and accessories
http://www.pearlfreeflight.com/Buy.html  Pearl Free Flight website Polecat X P30
http://www.bmjrmodels.com/free-flight/e-36/Starduster-E-36  BMJR Models Starduster e36
http://retrorc.us.com/retroemoth-1-2-1-2-2-1.aspx   Retro Gnome product link
http://www.bmjrmodels.com/sky-demon  - Sky Demon kit on BMJR website


Thursday, April 6, 2017

Jetstream A1 Towline Glider Build Report

Admittedly I did not give the selection of the Jetstream towline glider too much thought when picking this project to build. I was ordering from Jim O’Reilly Plans and decided after selecting the Wilbur Old Time rubber model to order another plan and short-kit. The Jetstream was a name I had heard of and I wanted to give the towline event a try. 


Jetstream Test Glide


The Jetstream was designed by Warren Kurth back in the late 1950’s and won the Nats 1959, 1960, and 1961 as well as setting a record for A1 towline glider. It was originally kitted by Ambroid the glue maker but was later kitted by Midwest and more recently by BMJR. The short-kit of the Bob Holman laser-cut parts even included the fuselage sides, the short kit you can purchase along with the plans from Jim O’Reilly plans.


Before Covering
Starting Construction

Construction was very straightforward and the glider framed up pretty fast. I had some decisions to make before completing the model such as covering material, DT system and how to setup up the autorudder. From opinions I received, Esaki tissue appeared the preferred covering, I did use a ribbon of double thickness covering in the wing to try to increase the stiffness.   For DT I originally was going to use a fuse but after seeing a picture of the Jetstream Rudy Kluiber had built I decided to use a mechanical timer, I selected the Micro DT from Texas Timers which I had also used in my Retro Gnome hi-start glider. For the autorudder I purchased  ASTOP rudder adjuster from Larry Davidson and allowed for adjustment in the tension of the line by using a tiny micro RC clevis. Tension in the opposite direction is with a tiny rubber band.


Line Tension and ASTOP Rudder Adjuster

Adjustable Towhook


Before building the Jetstream I built a Retro Gnome hi-start glider which uses a small rubber strand and a length of Dacron line to pull up the glider. Like the Jetstream towline the Retro Gnome also used autorudder to start the glider flying in a circular pattern while flying straight on tow. My thought was to learn how to get this adjusted with the smaller Retro Gnome before attempting the larger Jetstream and having to run while towing. On the Retro Gnome I had some trouble with the autorudder pin coming out so I changed it to be like the method used on the Jetstream which is a pin with a washer with line fastened to it. 


Retro Gnome Hi-start Glider

I did get some test glides of Jetstream this spring and the glide looks pretty good. One nose weight compartment has not been covered over yet so I can tweak the CG for glide. This coming weekend I hope to try the Retro Gnome again.  There is so much to experiment with when you build free flight model airplanes.


Bill Kuhl
http://www.ideas-inspire.com


Related Links

Jim O’Reilly Model Plans - http://www.jimoreillymodelplans.com/prodserve.htm
ASTOP Rudder Adjuster -  http://www.modelflight.com/larrydavidson.html
Texas Timers Micro DT - http://www.texastimers.com/
Warren Knuth Biography - https://www.modelaircraft.org/files/KurthWarren.pdf
Retro Gnome Build Report - http://scienceguyorg.blogspot.com/2016/12/building-retro-gnome-ff-hi-start-glider.html

Monday, April 3, 2017

My Start in Co2 Powered Free Flight

Even though I work with new technology I find much appealing from the past, in my model aviation hobby I am trying some types of model planes I missed out on when I was younger. A friend had seen my blog article about Tales of an Ancient Modeler and sent me a message that he had some CO2 engines and maybe I would be interested in buying them. Of course I jumped at this but now I had much to learn; the fun part. With a book on CO2, two more books that included CO2, and some instructions friend Gary sent, I read about CO2 motors.


Air Hare with CO2 Motor


What I did not know is there is more than one size of CO2 cartridges and I needed the shorter size to fit in the holder for charging. With the correct cartridges I ran the two identical motors and it seemed easy at first but I still do not have the filling procedure mastered.  I grabbed a Guillow’s Cloud Buster rubber powered model and cut the nose off so a firewall could be installed. The next challenge was the mounting holes in the back of the motor were so small no screws I had would fit so I used pins with plastic ball heads bent over on the back of the firewall to hold the motor on. Not satisfactory but I got in a few flights with the Cloud Buster. The power seemed really marginal for the plane but it was cold and misty that day so plane was carrying moisture. Level flight was about the best it could do.


Wrong CO2 Cartridge
Cloud Buster

An airplane with more wing area and about the same weight sounded like a better choice, I had this model the “Air Hare” that a couple of students had designed many years ago. I cut the nose off and installed a firewall but now I had very tiny bolts sold with model railroad supplies. Worked perfectly but getting the tiny nuts on is a little tricky. I had to slide the nut over a pin and press that against the end of the tiny bolt to get it started. I was going to fashion a DT system but ran out of time before I had a good day to fly.


Tiny Bolts for Model Railroading


Correct Size Cartridges

Last Saturday was the nice day to fly and I wanted to try the bigger airplane. I had a little trouble filling the tank but then I got a good fill and gave it a launch. Up it went always climbing, it leveled off at maybe a hundred feet high and slowly glided down. There was little wind but it was drifting ever closer to a road. I was so hoping it would not land on the road or past that in the trees. It landed just on the steep bank next to the road, I was relieved. After walking around the tiny stream of water to retrieve my plane I decided this was enough until a DT system is installed.


Air Hare Climbing under CO2 Power


Air Hare Landed at Edge of the Road


Somebody asked why use a CO2 powered engine?  I think for me it has to do with history, my engine is a Brown engine, a design from Bill Brown who probably manufactured one of the first commercially available model engines which was a gasoline ignition engine.  He later sold his CO2 engines; there were other manufacturers of CO2 engines also. CO2 is quiet, clean, and normally reliable but so is rubber power or electric. For me it is another challenge in my model aviation hobby which keeps me interested, while briefly frustrated at times.


Bill Kuhl
http://www.ideas-inspire.com

Related Links

Bill Brown Biography AMA website - https://www.modelaircraft.org/files/BrownWilliamLikensBillIV.pdf

My Old Article about the Air Hare - http://customers.hbci.com/~bkuhl/airharemain.htm

Tales of Ancient Modeler Review - http://scienceguyorg.blogspot.com/2017/03/norm-rosenstock-tales-of-ancient-modeler.html