 |
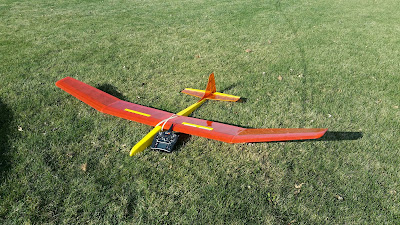
| Sig Riser 100 |
Most of my building of balsa models for the last several of years have been the more delicate free flight rubber powered stick and tissue models. In constructing the Riser 100 I didn’t have to be as delicate in how I grasped each part but I still manage to break a wing rib or two. After using CA, on each subassembly I would always check that all the joints were secure. For the plywood fuselage pieces it would often take using CA kicker to get a good hold on the joints. In the higher stress areas I used epoxy.
When I started building the Riser, I really didn’t want to deal with installing spoilers. So many people told me that I really needed spoilers so I decided to use a small servo for each spoiler in the wing halves instead of running string to a single servo in the fuselage as shown in the plans. The servo arms are extended and this pops the spoiler open, it worked well on another sailplane that I had been given.
I listened to other suggestions for the build and included big wing gussets at the end of the center section sheeting and also added carbon fiber on the top and bottom of the wing spars. For the hatch I used strong neodymium magnets in the rear instead of a nylon bolt. This appears to hold the hatch really tight but yet it is easy to remove and attach again.
Very late in 2015 I finished up the Sig Riser and was anxious to do some test glides so I headed to local park on my lunch. What could go wrong on a test glide, well on a little harder launch the Sig Riser 100 stalled and landed rather hard on one wing half. The transparent Monokote that I had done a pretty good job of covering with had a big rip in it. I was a little bummed out on that and decided to just tape it up with clear tape. After more flights I plan to recover the wing section but there could be more rips before I am really comfortable with flying a new sailplane.
 |
| Small Break After Sliding into my Foot |
Before attempting and more flights I added some weight to the nose, this did help the handling. There was a cloudy Sunday with low wind but only slightly above freezing that I decided I would try some high start launches. I was very pleased how well it was flying, the glide was better than the two meter sailplanes I normally fly. I made a landing towards myself and the sailplane just kept gliding, just as it landed in front of me, I realized it was going to slide along the ground farther than I thought. My efforts at getting out of the way were not completely successful as it hit one foot and broke a small chunk out of the leading edge. Another repair, I am hoping the minor bad luck with the Riser is all behind me now.
Really looking forward to flying the Sig Riser 100 in the spring and see how well it flies in thermal lift. The larger sailplanes are more efficient but with a greater weight is increased kinetic energy when hitting the ground or your shoe. I plan to be more careful on landings.
Bill Kuhl


Nice looking model.
ReplyDeleteThere are still some thermals in the winter. If it's not too windy or too cold for you, go for it. Fingerless gloves help. Or fingerless gloves with thin disposable latex gloves underneath. Really straight landings in powder snow will slide a long distance, which is kind of fun if you're not standing in the way.